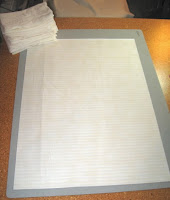
The steps for this project are standard for any fusible applique project.
1) Trace the appliques onto two-sided fusible webbing.

2) Iron the traced appliques to the wrong side of your fabric and cut them out.

3) Fuse the appliques onto a background.

All I have left to do on this one is to sew the blocks to a ribbon and hang it at the shop. Very cute.
The part of this project where I'd like to offer an alternative is in the construction of the background blocks. If you like to make small projects, they often do not require binding in the way a traditional quilt does. My least favorite part of these projects is when it says, "Sew right sides together leaving a small opening to turn." Those small openings can be a pain for getting a project turned, making neat corners, and getting the opening closed so that you can't tell where it was turned. I prefer to construct them in a way that is often called an "envelope" or "pillow cover" method. Since this specific project needed 18 background blocks, I was interested in making it as easy as possible.
First, determine the cut size of the background block. For the width, add half an inch to the finished width of the block. For the length, multiply the finished block length by 2, then add three inches. My finished width is 4 1/2" so my cut width is 5". My finished length is 6 1/2" so my cut length is 16".
From my background fabric I cut 16" by the width of fabric.
 Next, open up the fabric and finish the long edges. Turn under a quarter inch and top stitch 1/8" from the folded edge.
Now, it's time to cut them into five inch pieces for the individual blocks. I was able to get eight background blocks from each 16-inch panel.

At the ironing board, lay one background piece right side up. Fold one of the short ends towards the middle so that there is about four inches folded in. Then fold the other short end toward the middle overlapping the first piece so that the total length of the folded piece is 6 1/2". Press.
 Take this piece and lay it directly on top of a piece of batting cut 5" x 6 1/2". Sew a 1/4" seam along both long sides. The result should have fabric on one side and batting on the other.

It's time to turn it right side out. It's so nice to have a full side to turn. The corners turn out clean and crisp since there is stitching only on one side of the corner. Use your favorite turning tool to poke out the corners. My favorite tool is a bamboo skewer.
 Here's one finished background block.
 Iron on all those appliques for a fun garland ready for any occasion.

No comments:
Post a Comment
I love comments! Thanks so much for sharing with me.